How Integrations Work
Adding an integration to your Specode app follows this workflow:1
Tell the AI what integration you want
Describe the integration in your chat. For example:
- “Add Twilio SMS notifications when appointments are confirmed”
- “Integrate Stripe to collect copay payments at checkout”
- “Pull lab results from [Lab API] and display them in the patient dashboard”
2
Ask the AI what credentials you need
Ask: “What API keys do I need to add in Project Settings for this integration to work?”The AI will tell you exactly which keys to get from the external service.
3
Get your API keys
Sign up or log into the external service (Twilio, Stripe, etc.) and copy the credentials the AI specified.
4
Add credentials to Project Settings
Navigate to your project settings (click the project name in the top left corner), scroll to the bottom of the Integrations section, and add your key/value pairs.
5
Tell the AI and verify
Return to the chat and tell the AI you added the credentials: “I added my Twilio keys. Here are the values: [paste keys]. Can you verify the integration works?”The AI will execute or test the integration with your credentials.
This works for any service, not just the ones listed below. Whether you need voice/speech (Deepgram, AssemblyAI), payments (Stripe, Square), messaging (Twilio, SendGrid), or any other third-party API - the Specode AI coder can walk you through the setup. Just describe what you want in the chat and it will tell you which credentials to get and where to add them. The pre-configured integrations below are listed for convenience, but they are not the only ones supported.
Pre-configured Integrations
Follow the steps below to add common integrations one-by-one.1. CometChat Video Integration
What it’s for: Powers HIPAA-compliant video appointments between patients and healthcare providers.1
Contact CometChat
Contact CometChat to set up a HIPAA-compliant subscription for healthcare use. Or create a free account for testing purposes (no PHI!) at cometchat.com.
2
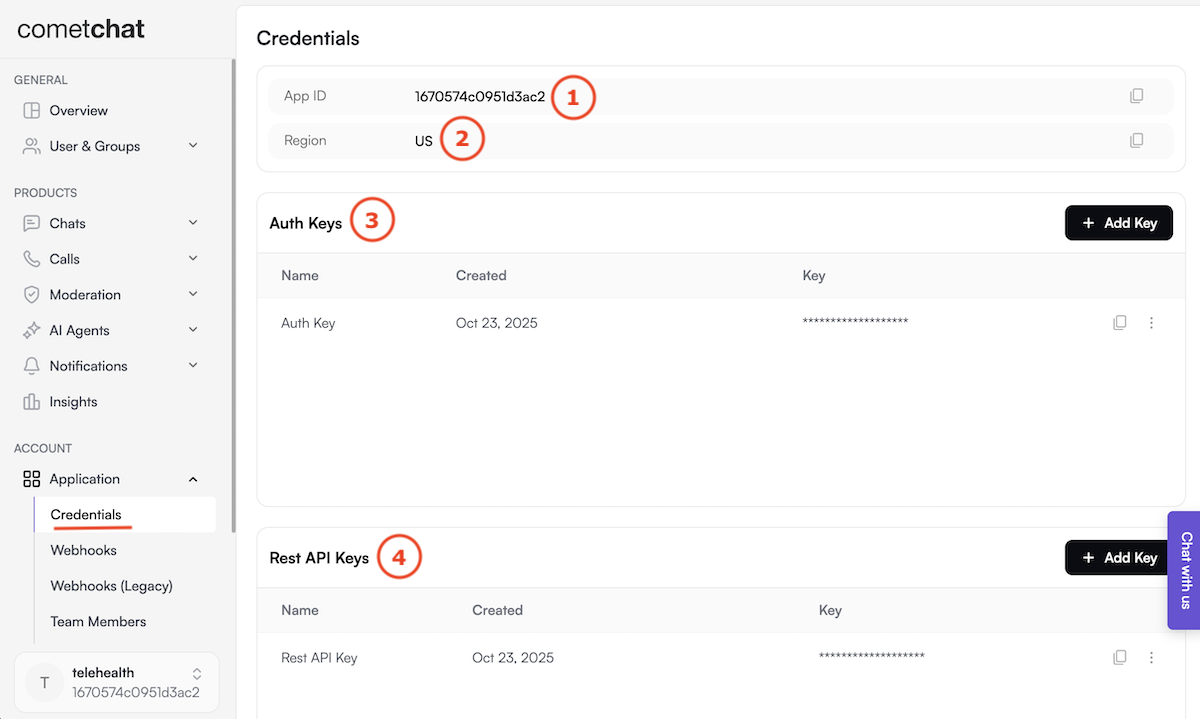
Get API Keys
Once approved, you’ll receive your credentials from the CometChat dashboard (left-side menu > Application > Credentials):
App ID→ e.g.1670574c0951d3ac2Region→us(in lowercase)Auth Key→ e.g.2cfa119703d62ed75774da4e33f9f96f85fdf96fRest API Key→ e.g.393a5593ceb9b9a638524fedad6f54151fc2019c
3
Configure Integration
Add the CometChat credentials to your Specode project settings.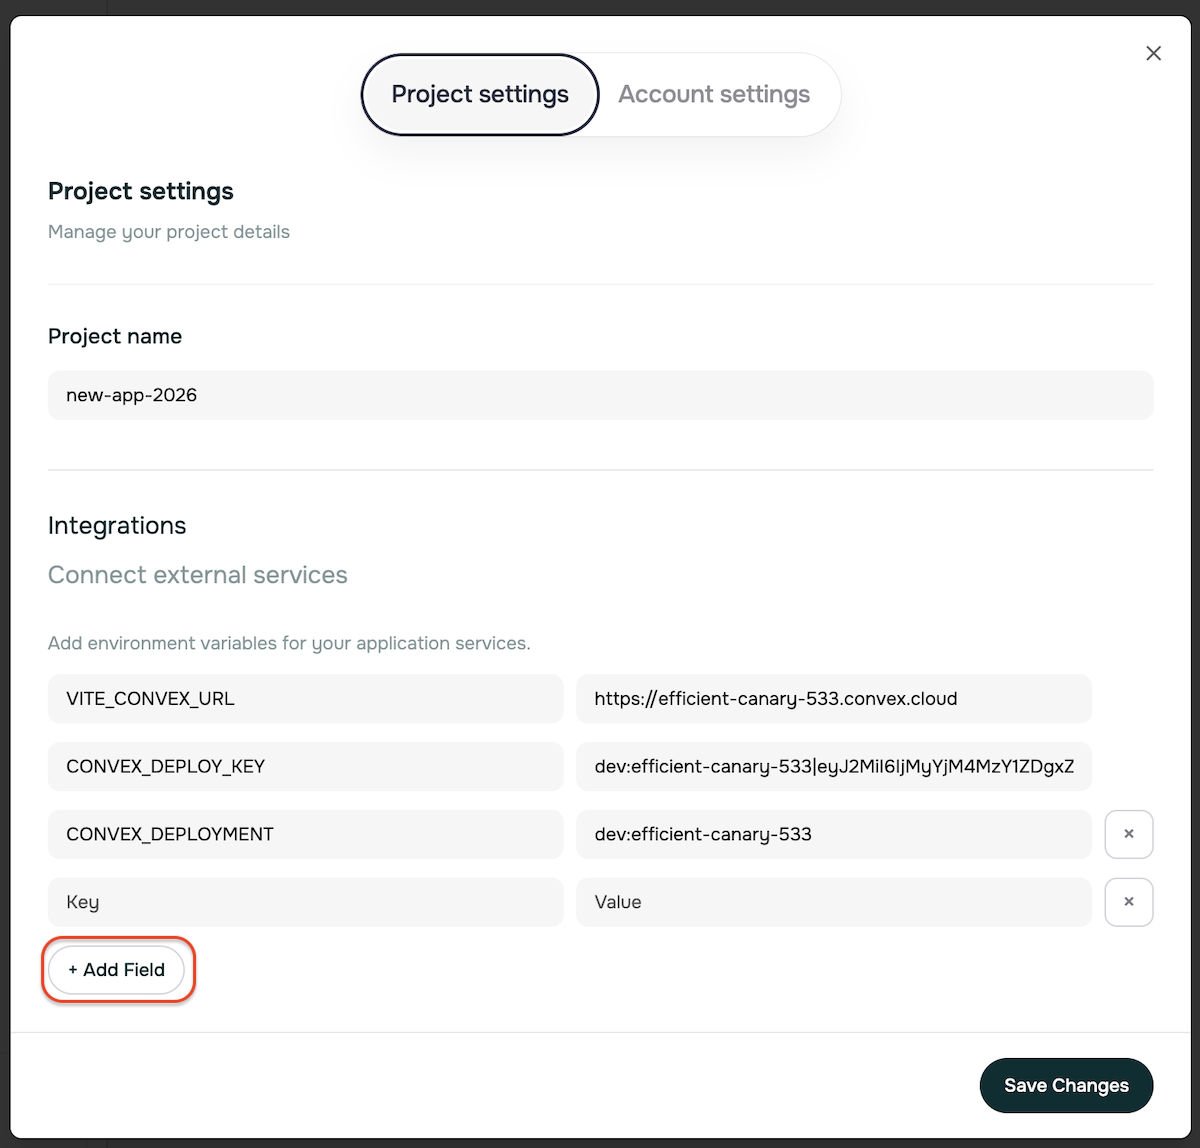
HIPAA Compliance Required: Standard CometChat accounts are not HIPAA-compliant. You must specifically request and pay for HIPAA-compliant video calling services before going live with patient video consultations.
2. Telegra Integration (Optional)
What it’s for: Provides telehealth and remote monitoring capabilities for healthcare providers.1
Contact Telegra
Reach out to Telegra for healthcare platform access
2
Get API Keys
Once approved, you’ll receive your credentials:
Telegra URL→Telegra_URLAPI Email→Telegra_API_EMAILAPI Password→Telegra_API_PASSWORD
3
Configure Integration
Add all three Telegra credentials to your Specode project settings
3. Junction Health Integration (Optional)
What it’s for: Integrates wearable device data and laboratory results for comprehensive patient monitoring.1
Contact Junction Health
Reach out to Junction Health for healthcare API access
2
Get API Key
Once approved, you’ll receive your credentials:
API Key→JUNCTION_API_KEY
3
Configure Integration
Add the Junction Health API key to your Specode project settings
5. Payment Processing
What it’s for: Processes payments for healthcare products, subscriptions, and services.Stripe restricts certain healthcare categories. Stripe is the easiest option for non-clinical apps, but its Restricted Businesses policy classifies telemedicine/telehealth and prescription pharmaceuticals as restricted categories requiring approval. Stripe also does not sign a BAA. The Specode team can help navigate Stripe’s approval process for restricted healthcare categories. See our Payment Processing Guide for full details on choosing the right processor.
Stripe
Stripe is the default payment integration. It works out of the box for non-clinical apps (wellness, fitness, education, memberships). For apps in restricted healthcare categories (telehealth, prescribing, pharmacy), the Specode team can help facilitate Stripe approval - talk to us before switching processors.1
Create Stripe Account
Go to stripe.com and create a business account
2
Switch to Test Mode
In the Stripe Dashboard, switch to “Test Mode” for development
3
Get API Keys
Navigate to Developers → API Keys and copy:
Publishable key→NEXT_PUBLIC_STRIPE_PUBLISHABLE_KEYSecret key→STRIPE_SECRET_KEY
4
Configure Webhooks
In Developers → Webhooks, add endpoint:
your-domain/api/webhooks/stripe
Copy the signing secret → STRIPE_WEBHOOK_SECRET5
Add to Project Settings
Add all three Stripe credentials to your Specode project settings
BAA-Signing Processors (For Telehealth, Rx, and Clinical Apps)
If your app involves telemedicine, prescribing, pharmacy services, or any flow where PHI may appear in the payment record, use a BAA-signing processor such as PaymentCloud, Helcim, or Corepay. These processors support recurring billing, card-not-present transactions, and sign BAAs. The Specode AI coder can integrate any payment processor that provides an API - just describe the integration in your chat and provide the credentials. See our Payment Processing Guide for a full comparison of processors by use case.Adding Custom Services
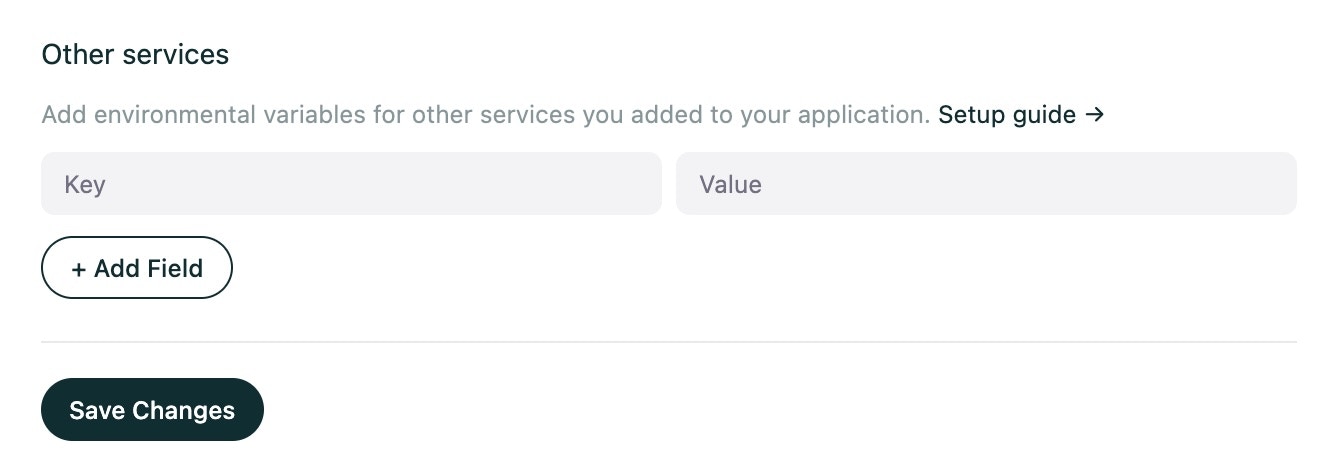
Need to integrate with other services? You can add custom environment variables for any additional APIs or services.1
Navigate to Settings
Go to your project settings in the top left corner of your screen
2
Scroll to Bottom
Scroll down to the bottom of the integrations section
3
Click Add Field
Click the “Add Field” button to create new environment variables
4
Configure Variables
Add your custom service credentials:
- Variable name (e.g.,
CUSTOM_API_KEY) - Variable value (your actual API key or credential)
Need Additional Help? If you encounter issues during setup, refer to our Troubleshooting Guide or contact your project team for assistance with HIPAA-compliant service configuration.